Showing posts with label pintester. Show all posts

Sunday, January 5, 2014

Cheap Eats :: Garbage Cookies


The holidays came and went and my family thought we were done with sweets, but nooooo. We needed more cookies in out lives apparently and inspiration struck on Pinterest, as usual.

I've had shredded coconut sitting in my cupboard for a few months, I bought it for a chicken recipe, but never got around to making it. So this recipe was right up my alley because I had all the ingredients on hand.

The original poster mentioned that you could add in almost anything, so I threw in some leftover peanut butter and chocolate chips I had laying around.

These were soo good. They were gobbled up almost immediately and the photos here are from the second batch in 3 days. I dare you not to love them!

Garbage Cookies


Ingredients:
1/2 Cup Butter, Softened
1/2 Cup Brown Sugar
1/2 Cup Granulated Sugar
1 Egg
1 Teaspoon Vanilla Extract
1 Cup All-Purpose Flour
1/2 Teaspoon Baking Soda
1/2 Teaspoon Baking Powder
1 1/2 Cups Flaked Coconut
1/2 Cup Chocolate Chips
1/2 Cup Peanut Butter Chips
Pinch of Salt


Directions:
Preheat oven to 375 Degrees.


1. Cream together the butter, sugars, egg and vanilla.
2. In a separate bowl, mix together flour, baking soda,
baking powder and salt.
3. Slowly incorporate flour mixture in with the creamed
butter and sugar.


4. When well mixed, add the flaked coconut and chips.
5. Once that is combined, drop onto parchment lined
baking sheets and bake for about 8-12 minutes
or until browned.
6. Let cool and serve.


Printable Recipe Card Below

Sunday, August 18, 2013

Cheap Eats :: Sesame Chicken


I am back! I took a bit of a break from blogging last month because we decided to cram a bunch of summer into a couple of weeks and I wasn't planning my meals as much as I should have or even cooking at home as much as I could have.

School is back in session and cooking at home is a necessity again and the budget is as tight as ever.

The husband has been working nights and my little boy has been with his Dad, so it's just been me and Lucy for dinner time around here. I make enough for Tim, but he eats it when he gets home.

When it's just me and the baby, my motivation to make difficult meals wanes...especially when I have gotten out of the habit of making daily meals.

To jump back into the swing, I hit Pinterest, ya know, like I do. I pinned lots of inspirational recipes and began planning my next two weeks and did my shopping, all along crossing my fingers that I follow through and actually cook my planned meals.

I love Chinese food, I can't afford to eat take out often and it's certainly not as healthy or tasty as making it at home. I am often intimidated by making Asian-inspired foods but I've been trying to dip my toe in one recipe at a time.

Last night it was this recipe for Sesame Chicken I found here.

This recipe is easy, reasonably quick and above all it was really really delicious. Sooo good. I had to stop myself for gobbling up my husband's portion.

Sesame Chicken
 
Ingredients
 
Chicken

1 large egg
2 Tbsp cornstarch
1 pinch each salt & pepper
1 lb. boneless, skinless chicken thighs
2 Tbsp vegetable oil (for frying)


Sauce

2 Tbsp soy sauce
1 Tbsp water
½ Tbsp toasted sesame oil
1½ Tbsp brown sugar (I used dark brown)
1½ Tbsp rice vinegar
1 inch fresh ginger, grated
1 clove garlic, minced
2 Tbsp sesame seeds
1 Tbsp cornstarch


Instructions
 

1. In a large bowl, whisk together the egg, 2 Tbsp cornstarch, and a pinch of salt and pepper. Trim any excess fat from the chicken thighs, then cut them into small 1 inch pieces. Toss the chicken in the egg and cornstarch mixture.
 

2. Heat a large skillet with 2 Tbsp of vegetable oil over medium-high heat. When the oil is very hot (it should look wavy on the surface), add the chicken and all of the egg mixture. Cook the chicken, stirring only occasionally, until it is golden brown and cooked through (about 7-10 minutes). Drain off the excess oil, if desired.
 

3. While the chicken is cooking, prepare the sauce. In a small bowl stir together the soy sauce, water, sesame oil, brown sugar, rice vinegar, fresh ginger, minced garlic, cornstarch, and sesame seeds. (You can grate the ginger with a small-holed cheese grater).
 

4. Once the chicken is cooked through and golden brown, pour the sauce over top. Toss the chicken to coat in the sauce. The sauce will begin to thicken as soon as it hits the hot skillet. Once the chicken is coated and the sauce thickened, turn off the heat.
 

 5. Serve the chicken over a bed of rice and sprinkle the sliced green onions over top.
 
I love love loved this recipe and will definitely be adding it to the regular rotation. According to the author of this recipe, this will feed 4 and a grand total of $5.15. Not too shabby price-wise, eh?
 
Again, you can find the original recipe here.

Tuesday, June 18, 2013

Cheap Eats :: Creamy Garlic Pasta


I found this recipe on Pinterest a couple months ago and it quickly became a family favorite around here. For me, it's how fast and easy it pulls together. For them, it's the amazing taste!

My son, the picky one, always gobbles up every last bite and asks for seconds. My daughter, the baby who eats everything, loves it enough to grunt for more. The husband, who isn't the biggest eater, will eat a heaping bowlful happily. It's a guaranteed crowd pleaser...and a joy to make. I have the recipe memorized now, I've made it THAT much.

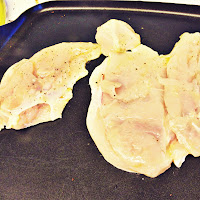
Tonight, I made it with an added element...chicken breast. I know, I know...chicken breast?! From the dark meat lady?! Well, to be fair...I was gifted the chicken breast by my sweet cousin who brought me some groceries after an especially bad day. I already had creamy garlic pasta in the menu and thought the chicken would be a nice treat! (Thanks cuz!)

Otherwise, this makes a fantastic meatless (not vegan) meat.

It's feeds 3-4 people with no leftovers. If you have big eaters, I suggest doubling it. We are not big portion types, so this is perfect for my family of two adults/two kids.

Creamy Garlic Pasta + Chicken

Ingredients
2 tsp olive oil
4 cloves garlic; minced
2 Tbs butter
1/4 tsp salt
1/2 tsp pepper
3 c chicken stock water +
2 tsp chicken bouillon
8 oz angel hair pasta
1 c grated  shredded parmesan cheese
3/4 c heavy cream
2 Tbsp chopped fresh parsley (optional)
---
2 thin chicken breasts (hammered thin or sliced thin)
1 tbs olive oil
salt and pepper

Directions
Pasta


1. In a pot, bring the olive oil to medium-low heat. Add the garlic and stir, allowing it to cook for 1-2 minutes.
2. Add the salt, pepper, water + bouillon. Raise the heat to high and let it come to a boil.


3. Once it is at a rolling boil, add the pasta and cook until tender.
4. Reduce the stove to medium heat and mix in the parmesan until completely melted.


5. Turn off the heat and stir in the cream. Serve immediately.

Chicken
1. Coat chicken in oil and season


2. Heat skillet or griddle to med-high
3. Cook chicken while pasta cooks turning half-way through (about 8 mins on each side)
4. Cook until chicken is no longer pink
5. Slice and divide among pasta bowls.


Thursday, June 13, 2013

Cheap Eats :: Peanut Butter Oatmeal Chocolate Chip Cookies


I saw this recipe over on Pinterest the other day and it looked good...really good! I've never made no flour, no butter cookies. I was intrigued! 

I had all the ingredients except for one...vanilla extract. I was not deterred. I decided to add an ingredient in that I know tastes amazing with Peanut Butter...maple syrup.

Here is the recipe...[with my notes]

Peanut Butter Oatmeal Chocolate Chip Cookies
Ingredients
  • 1 cup creamy or chunky peanut butter [i used Jif Chunky]
  • 2/3 cup packed dark brown sugar
  • 1 1/2 teaspoons vanilla maple syrup or pancake syrup
  • 2 large eggs
  • 2/3 cup rolled oats [g-free if you want]
  • 1 teaspoon baking soda
  • 2/3 cup chocolate chips
  • [I highly recommend adding 1/8 tsp salt]
Instructions

1. Preheat oven to 350 degrees F

2. In small bowl mix together the oats and baking soda; set aside.


3. In a large bowl beat peanut butter, brown sugar, eggs and vanilla with an electric mixer until smooth, about 3 minutes. Mix in dry ingredients, then gently fold in chocolate chips.

4. Roll cookies into 2 inch dough balls and place onto cookie sheet 2 inches apart, then BARELY flatten the top of the cookie with your hand. The dough should be pretty sticky so if you find this method annoying, simply use a cookie scoop to drop the cookie dough onto the prepared baking sheet. The cookies may not be as round in shape and perhaps a bit thicker, but that’s okay, they will still be delicious. I used an ice cream scoop and dropped my dough onto the sheet. This way yielded only 10 cookies...and they came out huge! Next time, I would roll them into small balls as suggested.
[the dough being sticky is an understatement. It's like no other dough I've made, but so are these cookies. Don't be freaked out about it.]


5. Bake cookies for 9-11[mine went a full 11] minutes and remove when edges barely begin to turn a golden brown. The cookies may look a little underdone, but they will continue to cook once you remove them from the oven. Cool for 2 minutes on the cookie sheet then transfer to a wire rack to cool completely. Repeat with remaining cookie dough. Makes 16-20 10 cookies.


Verdict

Not bad...but not great. It has a decent cookie texture, the lack of flour does make it a bit runnier in the middle (even though they were totally cooked).
Bigger issue, it needs SALT. There is no salt in this recipe and it tastes like it. A whole level of flavor is missing and salt really adds to the taste of peanuts and chocolate. Next time (if there is one, I'd add 1/8 tsp of salt, maybe 1/4 tsp).
All in all...add salt, make sure you don't make them as big as I did, and it should be a pretty good cookie fix for g-free peeps.

Sunday, June 9, 2013

Cheap Eats :: Pork Fried Rice

I recently was taken to Benihana for my birthday by my parents. It reminded me of how much I like freshly made fried rice! Also, watching the chef make it in front of me made me realize how easy it is to make!
Ever since, I have been looking at recipes online trying to find one that matched up with the ingredients I already had on hand.
I found a close match here. Aside from chicken (I had a frozen pork chop), not having frozen veggies, but I had some carrots, and not having green onions but a red one...everything else was a go!
So I defrosted my pork chop and chopped up my veggies and broke out my brand new wok (birthday prez) and went to work.

Pork Fried Rice
Serves 4

Ingredients
2-3 cups Cooked Rice (leftovers or cooked ahead and cooled to room temp)
1 pork chop - diced and seasoned with salt and pepper
1/2 cup chopped carrots (or 1/2 frozen or fresh veg of choice)
1 tbs of water
1 med red onion - finely chopped
1 clove garlic, minced
dash of ginger
1 egg mixed with a tsp of sesame oil (beaten)
3-4 teaspoons sesame or wok oil, divided
3 Tablespoons soy sauce mixed with...
1 tbs of brown sugar (dark or light)


Directions
1. Heat a teaspoon of oil in the wok on high
2. Add meat and cook for 3-5 minutes until cooked through (remove to plate)


 3. Add another teaspoon of oil to wok and add veggies, saute 5-7 minutes until onion is translucent and carrots are getting tender(add tbs of water during saute to help the carrots along)
4. Add garlic and ginger to veggies and saute for another minute.


5. Push veggies to the side and add egg beaten with oil and scramble a bit
6. Mix veggies and egg
7. Toss in the rice and soy sauce (mixed with brown sugar) and combine all ingredients. Make sure to break up all the clumps of rice and combine it with the sauce well


8. Toss the meat in and mix well
9. Remove from heat and serve!


Seriously, this was soooo good! My  rice was a little overcooked and mushy...but it tasted so good, I didn't care! It was a hit with the huz too. He said I should add it to the regular rotation...so yeah, do it!

Friday, June 7, 2013

Cheap Eats :: Homemade Hamburger Buns


About a month ago, I decided to try my hand at making my own hamburger buns. Buying the cheap ones, what I normally do, are good for keeping the calorie count at bay (each bun is about 100-110 calories) but they aren't very good and they are full of preservatives and other nastiness.
The ones that are any good, are out of the price range I'd like to spend. The ones in the bakery section would be the best option, but nothing really beats homemade.
The price to make them can't be beat. A couple cups of flour, some yeast, sugar, some milk...easy.

I found this recipe and photo tutorial on Pinterest. It seemed simple enough.

The results were a success! I rolled them a bit too thin, but they were very good. The flavor was wonderful and my house smelled amazing!
The recipe made about a dozen buns, but like I said, they were thin. Next time, I would expect a smaller yield, but still enough for a couple of meals. I simply froze the rest.

They are especially delicious grilled with a bit of butter. This softened them up, and added some extra flavor. Keeps the juices from your burger, sloppy joes or whatnot, from making your buns soggy.

Tonight, we defrosted a few and made some simple Sloppy Joes. We had some leftover Mac & Cheese on the side. Double your comfort food, double your fun!


Homemade Hamburger Buns: recipe from Eat Live Run 
makes about 10 hamburger buns


Ingredients:
2 tbsp butter, softened
1 cup milk
1 packet dry active yeast (1/4th oz)
2 tbsp warm water (about 100 degrees)
1 egg
1.5 tsp salt
2 tbsp sugar
3 cups flour (plus a little additional flour if you need it)
for topping—
2 egg yolks + 1 tbsp warm water, slightly beaten
sesame seeds and/or poppy seeds


Directions:
1. heat the milk in a small saucepot over medium heat until bubbles appear all around the sides of the pot. Remove quickly and let cool to the temperature of warm bathwater (about 100 degrees F).

2. In a little bowl, combine the dry active yeast, 2 tbsp warm water and a pinch of sugar. Stir with your finger a couple times and then let sit for about 5 minutes. The yeast should start to bubble a little bit and get creamy/foamy looking.

3. In the bowl of a mixer, combine the soft butter, slightly cooled milk (test it with your finger first and let it cool a few more minutes if it still feels burning hot), egg, sugar and yeast. Mix on low until combined and butter melts.

4. Mix together two cups of the flour and the salt, then add that to the wet ingredients. Mix on high until well blended.

5. Change to a dough hook on your mixer if you have one (this thing always reminds me of Captain Hook…anyone?). With the dough hook on, add the remaining cup of flour and mix on high speed for five minutes. You can add a little bit more flour here if your dough seems especially wet, but remember that this dough is supposed to be sticky!

6. After five minutes on high, your dough should be sticky, but also smooth and elastic if you stretch it with your fingers. Remove dough from bowl and place in an oiled mixing bowl. Cover with plastic wrap and let rise in a warm spot for 2 1/2 hours.

7. After 2 1/2 hours, punch down dough on a floured surface then roll out to 1/2″ thick. Cut circles using a large biscuit cutter or the bottom of a glass. Place circles on a parchment paper or silpat-lined baking sheet. Place another piece of plastic wrap on top and let rise again for 1.5 hours.

Preheat your oven to 375.

Brush the rolls with the egg yolk and warm water mixture then scatter sesame seeds over top. Bake for 20 minutes until deeply golden.


Time:
5 hours