Showing posts with label tamieeatscheap. Show all posts

Wednesday, January 8, 2014

Cheap Eats :: Creamy Baked Pasta with Spinach


This is my husband's absolute, outright favorite dinner ever. He begs for it all year and he gets it...well, he gets it about once a year. It's his special birthday dinner, but this year he was working on his birthday so we didn't get around to making it until now.
He was so excited and he and Lucy gobbled it up like it was going out of style!
This is a meatless dish and could easily be made vegan with some substitutions. Not mention...it's pretty danged cheap:

Creamy Baked Pasta with Spinach

Ingredients
8oz penne pasta (or any other pasta)
1 (24-28oz) can of spaghetti sauce
8oz softened cream cheese
1/2 cup milk
1/4 cup parmesan cheese
5-10 oz chopped frozen spinach (thawed and squeezed dry)
*I used 5 oz because I like less
dash of nutmeg
pinch of salt & pepper
1 cup mozzarella cheese (shredded)

 Directions (Pre-heat to 350F)
1. Cook Pasta according to directions/drain
2. Whisk cream cheese and milk until smooth
 3. Add spinach and parmesan to cream cheese
4. Season with salt, pepper and nutmeg


5. Mix pasta with spaghetti sauce
6. Layer 1/2 the pasta in the bottom of baking dish
7. spread cream cheese mixture over pasta layer
8. Top with remaining pasta
9. Add mozzerella cheese to top


10. Cover with foil or lid and bake @ 350F for 30 mins
11. Remove cover and bake an additional 10-15 mins until cheese browns at the edges


Monday, June 10, 2013

Eating Cheap :: Meal Planning When You Have Unexpected Expenses


We've had some car and health related expenditures this month which left our already thin food budget even thinner this month.
I'm sure some of you have been there, when the pot gets slashed and you wonder how on earth you are going to feed the troops with the pennies you have left.

Where to start?

Inventory
The first step, like in your normal meal planning, is to hit the kitchen and do some inventory. Check the freezer first for meat.
In my case, I had 2 (small) meals worth of chicken thighs, 2-3 meals worth of pork chops, some leftover cooked chicken in a freezer (enough for soup) and some pepperoni, enough for two pizzas (if I'm careful).
So all in all I could squeeze 7 meals out of it, if need be. Great! But I need enough for 9-10 dinners. And because of the rationing of the meat, there won't be leftovers (maybe some soup, which is only going to be enough for lunch).

In the pantry, I have 1lb of spaghetti (that two meals worth for a family of 4). I have a large loaf of bread, a couple tortillas, some peanuts and other things I can use in meals. I also have plenty of baking ingredients, like flour/sugar etc.

Once you have an idea of what you have, you get a better idea of what you need.

I know that I'll have my son (who I split custody of) for 7 of the next 10 days. So there's an extra mouth to feed for those days. It's also summer vacation, so I'll need lunch food for us both, as well as snacks.
I know I could squeeze 2 spaghetti dinners, one with meat and one without. If I get some angel hair, I could have a cheap meatless meal of the creamy pasta that my family LOVES.
With just a few things, I could round out what I already have and have enough food to make it to the next payday.

Fix a budget
I know I can only comfortably(or uncomfortably) spend $40. I know the market that generally has the cheapest prices in town. I will have to limit my trips to one store to save on gas too.
Now I can make my list of the essentials.

Make a Meal List
You need to do this with recipes handy so you know what ingredients you will need to round out the food you already have. I start with a list of the meat/main ingredient and then find recipes from there.

1. Chicken
2. Pork
3. Pasta
4. Chicken
5. Soup
6. Pork
7. Pizza
8. Gr. Beef
9. Chicken
10. Pasta

Then I decided, one by one, What recipe I'll use on each meal and evaluate my ingredient needs.

1. Sweet and Sticky Chicken (own recipe)
2. Pork Chops and potatoes
3. Creamy Pasta
4. Teriyaki Chicken and Rice
5. Chicken Noodle Soup
6. Pork Stir-fry (either fried rice or chow mien style)
7. Pepperoni Pizza
8. Tamie's Yummy Burritos (own recipe)
9. Roast Chicken Thighs and Potatoes
10. Spaghetti with Italian Sausage

Now I have a rough idea of what I have and what I need. I decided to get a tray of chicken legs to add more chicken and use less pork. I decided to get a tube of Italian sausage to add to the spaghetti. I have some ingredients left over from dinners not eaten from my last meal plan (we ate out more than anticipated), so it was a jumping off point to finding recipes that would work with the main ingredients I had.
Now that I have a meal list, it's time to buckle down and...

Make a Shopping List

With my $40 for 10 day budget in mind, I made a list of the things I would need to feed my family for the next 10 days.
I knew the baby would need milk.($3) I knew my son would need bananas($2) and string cheese($2). I knew we needed mayo($2) and lunch meat($3). I also knew I'd want popcorn($2). I'm already $14 in...
I also wanted a back-up no-brainer meal for a night that I couldn't find the energy to cook (or for a lunch). I chose hot dogs($2), but I decided to try making my own buns.
After buying what I needed...I walked out of the store spending $38.51 (thanks to a coupon on the jar of mayo for an addition $1 off).

My Receipt


Luckily for me, I had a good amount of food already in my cupboards. But if I had to improvise, it wouldn't have been too difficult to make a list with meatless meals using beans, pasta or eggs as a base ingredient.
9/10ths of the battle is won with planning and being creative with what you have in the cupboards. Flour is cheap and you can bake your own sandwich bread or buns.
Making do with what you have can be done if you're careful and you don't have to resort to eating crap to do it.
You can eat healthy, gourmet style foods on a shoestring if you take a bit of time.
The amount of time is nothing when you think about it. I spent around an hour planning the meals for 10 days, and I had to be extra creative this time.
Unexpected expenses happen. I know our next pay period will be tight as well with even more car related expenses coming, but I know I can plan around them and find a way to stay in my budget, even if that budget is only $50.


Friday, June 7, 2013

Cheap Eats :: Homemade Hamburger Buns


About a month ago, I decided to try my hand at making my own hamburger buns. Buying the cheap ones, what I normally do, are good for keeping the calorie count at bay (each bun is about 100-110 calories) but they aren't very good and they are full of preservatives and other nastiness.
The ones that are any good, are out of the price range I'd like to spend. The ones in the bakery section would be the best option, but nothing really beats homemade.
The price to make them can't be beat. A couple cups of flour, some yeast, sugar, some milk...easy.

I found this recipe and photo tutorial on Pinterest. It seemed simple enough.

The results were a success! I rolled them a bit too thin, but they were very good. The flavor was wonderful and my house smelled amazing!
The recipe made about a dozen buns, but like I said, they were thin. Next time, I would expect a smaller yield, but still enough for a couple of meals. I simply froze the rest.

They are especially delicious grilled with a bit of butter. This softened them up, and added some extra flavor. Keeps the juices from your burger, sloppy joes or whatnot, from making your buns soggy.

Tonight, we defrosted a few and made some simple Sloppy Joes. We had some leftover Mac & Cheese on the side. Double your comfort food, double your fun!


Homemade Hamburger Buns: recipe from Eat Live Run 
makes about 10 hamburger buns


Ingredients:
2 tbsp butter, softened
1 cup milk
1 packet dry active yeast (1/4th oz)
2 tbsp warm water (about 100 degrees)
1 egg
1.5 tsp salt
2 tbsp sugar
3 cups flour (plus a little additional flour if you need it)
for topping—
2 egg yolks + 1 tbsp warm water, slightly beaten
sesame seeds and/or poppy seeds


Directions:
1. heat the milk in a small saucepot over medium heat until bubbles appear all around the sides of the pot. Remove quickly and let cool to the temperature of warm bathwater (about 100 degrees F).

2. In a little bowl, combine the dry active yeast, 2 tbsp warm water and a pinch of sugar. Stir with your finger a couple times and then let sit for about 5 minutes. The yeast should start to bubble a little bit and get creamy/foamy looking.

3. In the bowl of a mixer, combine the soft butter, slightly cooled milk (test it with your finger first and let it cool a few more minutes if it still feels burning hot), egg, sugar and yeast. Mix on low until combined and butter melts.

4. Mix together two cups of the flour and the salt, then add that to the wet ingredients. Mix on high until well blended.

5. Change to a dough hook on your mixer if you have one (this thing always reminds me of Captain Hook…anyone?). With the dough hook on, add the remaining cup of flour and mix on high speed for five minutes. You can add a little bit more flour here if your dough seems especially wet, but remember that this dough is supposed to be sticky!

6. After five minutes on high, your dough should be sticky, but also smooth and elastic if you stretch it with your fingers. Remove dough from bowl and place in an oiled mixing bowl. Cover with plastic wrap and let rise in a warm spot for 2 1/2 hours.

7. After 2 1/2 hours, punch down dough on a floured surface then roll out to 1/2″ thick. Cut circles using a large biscuit cutter or the bottom of a glass. Place circles on a parchment paper or silpat-lined baking sheet. Place another piece of plastic wrap on top and let rise again for 1.5 hours.

Preheat your oven to 375.

Brush the rolls with the egg yolk and warm water mixture then scatter sesame seeds over top. Bake for 20 minutes until deeply golden.


Time:
5 hours

Monday, June 3, 2013

Cheap Eats :: Barbecue Chicken Pizza and Pizza Dough Recipe

Cheap Eats :: Barbecue Chicken Pizza and Pizza Dough Recipe

Pizza is one of my very favorite foods. I could really, honestly eat it every single day. I have some favorites that I make on a regular basis...and BBQ Chicken is a family favorite in our house.
Depending on my monthly budget, I sometimes buy ready made dough in the store. Both Trader Joe's and Winco have really yummy bagged dough in both white and whole wheat varieties. I love all 4 variations.
But when things are extra tight...you cannot beat homemade dough. It's really not that difficult to whip up and it costs pennies to make.
Here is a recipe I have been using recently. My family likes it very much and I do too, though I am still experimenting now and again to find the perfect one.
Don't get hung up on the equipment. You can make a square pizza on a cookie sheet, you can even use an old cast iron skillet for a deep dish style pie.
I enjoy using my pizza stone, but mine is 13" so when I need to feed a group, I use a large 16" pizza pan.

Tamie's Pizza Dough Recipe

Ingredients:
2 1/4 tsp Dry Active Yeast
1 cup lukewarm water
1 tbs sugar or honey
2 1/4 cup All-purpose flour [plus up to 1/2c on the side for kneading]
1 tsp salt
1 tbs Olive Oil
Cheap Eats :: Barbecue Chicken Pizza and Pizza Dough RecipeCheap Eats :: Barbecue Chicken Pizza and Pizza Dough Recipe

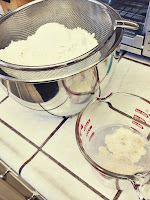
1. add yeast and sugar to lukewarm water (set aside to activate)
2. mix flour and salt in your stand mixer bowl (or in a regular bowl)
3. add water/yeast mixture to the flour
4. add olive oil in as well


Cheap Eats :: Barbecue Chicken Pizza and Pizza Dough RecipeCheap Eats :: Barbecue Chicken Pizza and Pizza Dough Recipe
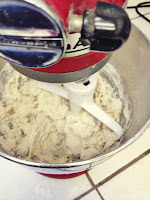
5. using the paddle attachment, mix on low until well incorporated.
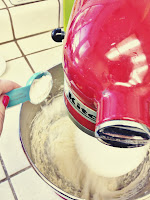
6. switch to your dough hook, knead dough on high speed for 5 mins [add more flour to the bowl 1tbs at a time until your dough isn't sticking to the bottom of the bowl anymore]
Cheap Eats :: Barbecue Chicken Pizza and Pizza Dough RecipeCheap Eats :: Barbecue Chicken Pizza and Pizza Dough Recipe
7. when your dough is done kneading, add it to an oiled/greased bowl and let the dough rise for 1-2 hours, or until it has doubled in size. [I like to put it in the oven with the light on, cover it with plastic wrap or a clean kitchen towel if you'd like...sometimes I do, sometimes I don't]


Cheap Eats :: Barbecue Chicken Pizza and Pizza Dough RecipeCheap Eats :: Barbecue Chicken Pizza and Pizza Dough Recipe
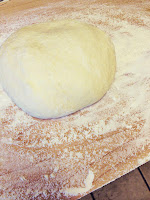
8. turn your dough out onto a floured surface or pizza peel to rest for 10-20 mins. (while you assemble the ingredients for your pizza)
*note: For a 12-14" pie, this dough will make two pizzas. For bigger pies, use the whole ball. Normally I divide my dough in half on the cutting board and save the other half for another night. (use within a day or two or freeze for a month or two) This time I used the whole ball for a 16" pie.

Cheap Eats :: Barbecue Chicken Pizza and Pizza Dough RecipeCheap Eats :: Barbecue Chicken Pizza and Pizza Dough Recipe

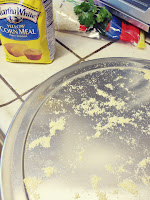
9. I add cornmeal to the pan I am using for my pizza so the dough will not stick. It will not burn and it's especially important if you are using a pizza stone. If you are using a baking sheet, you can opt for cooking spray.
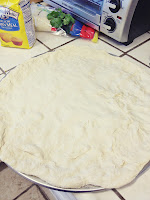
10. stretch or roll out your dough to the size needed. I stretch mine by hand...but rolling is fine. I'm even trying to teach myself to spin the dough. But this still scares me and I'm not good enough at it to instruct anyone on it yet.
Now to the Barbecue Chicken Pizza portion of the post:


Saturday, June 1, 2013

Live Cheap :: Don't Buy Paper Towels

Live Cheap :: Don't Buy Paper Towels

I have spent the last few years trying to reduce the spending in my home. I hated blowing so much money on sundries (def: Miscellaneous small items, usually of no large value and too numerous to mention separately).
I especially scoffed at the huge price tag on paper goods. Firstly, we all know that from an environmental standpoint, paper products are all bad. Even the recycled stuff isn't ideal. Secondly, I plain old hate waste. Popping off a paper towel for every time I washed my hands or to clean a small spill...it hurt me...I HATE it!
So a few years ago, I decided to stop buying them and figure out how to live without them. I do buy paper napkins for meals (for now...I'll be transitioning to cloth napkins as soon as I learn to sew properly.).

Live Cheap :: Don't Buy Paper Towels
Bar Mops via Target
So, what do I use?
  • Bar mops - for my counters [$3.99 for 6 at Target]
  • Rags - for furniture and bathrooms [made from old t-shirts or towels or purchase at the dollar store]
  • Flour Sack Towels - for kitchen tasks and hand drying [about the same as bar mops in price]

I keep an old trash can in my closet (by the hamper) and I toss the soiled ones in there. When I run out, I wash the load on hot with borax or bleach for tough stains. 

Not buying paper towels can save you conservatively around $150 a year depending on the size of your family. Having that extra $10-15 extra every month adds up. And the hassle of doing a load of laundry about once a week...not a big deal at all! You are doing laundry anyway!
Live Cheap will feature things I do in my own home to cut back on my monthly budget.  Look forward to tips on your keeping the cost of  running your house in check while wasting less, using less chemicals and doing a bang up job of keeping your house clean and well maintained...on the cheap.


Friday, May 31, 2013

Cheap Eats :: Make your own bagged salad

Cheap Eats :: Make your own bagged salad
I mentioned in my "Meal-planning 101" post that you should never bother with buying bagged salad or lettuce. Good quality lettuce is expensive when purchased bagged and the quality suffers so much before you ever even open it. Buying lettuce, chopping, washing and storing it yourself is super duper simple and best of all...it's cheap!

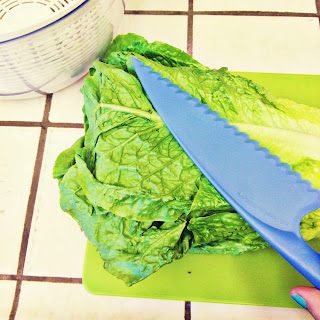
At Winco, I buy a head of Romaine lettuce for $1.48. When I get it home, I get out my handy dandy Lettuce Knife (pictured) and prepare to chop. The lettuce knife is plastic and serrated. It's said that using a plastic knife keeps the lettuce from oxidizing and turning brown at the edges. I have used both a lettuce knife and a regular metal one and have noticed very little difference. So, if you don't have one, don't let that deter you from trying this.

Equipment Needed:
  • Cutting Board
  • Salad Spinner or large bowl and strainer
  • Plastic Lettuce Knife or a good sturdy knife
  • A gallon zip-top bag
  • A paper towel or napkin 

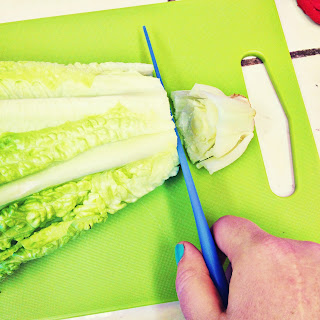
I chop before I wash. It's much easier that vice versa. Lay you head of lettuce on the cutting board and begin chopping at the base.
Cheap Eats :: Make your own bagged salad
Throw that bit away, compost it...or use it to regrow your head of lettuce.
Continue chopping it in one inch slices all the way up!
 Cheap Eats :: Make your own bagged salad
Dump the lettuce in your salad spinner and fill the bowl with the coldest possible water from your tap. The cold water with refresh your lettuce and make it bright and crispy. I let mine soak for awhile...usually while I cook dinner.

Once you let it soak strain it and empty the water from your spinner. I spin my lettuce twice to get it as dry as possible. If you don't have a spinner, you can let it sit out in the strainer or dry it with paper towels...though a salad spinner is a worthy investment and can be bought on the cheap.

Dump the dried lettuce in the gallon sized zip-top bag, toss in your paper towel or napkin and seal it up, removing as much air as possible from the bag.
Cheap Eats :: Make your own bagged salad
And that's it! My salad lasts up to a week or more in the fridge. I've had it last 2 and a half weeks before with only slight browning at the edges (which doesn't effect the taste very much at all).

Never buy that bagged crap again!


Thursday, May 30, 2013

Cheap Eats :: Barbecue Baked Chicken

Cheap Eats :: Barbecue Baked Chicken
Barbecue Baked Chicken is one of our staple dinners. It's very inexpensive and easy to make. I feel almost silly even blogging about it, but since I once needed to to a Google search on how to do it, I figured you might need the know-how too.

Barbecue Baked Chicken

Ingredients
  • 8-10 bone-in, skin-on chicken thighs or legs
  • about a half a bottle of BBQ Sauce (I used Sweet Baby Ray's Honey BBQ Sauce, I love all the flavors of this brand...and it's cheap!)
  • kosher salt and pepper

Directions
Preheat oven to 400F
Rinse chicken and pat dry
Place chicken on foil lined baking sheet
Sprinkle each leg with salt and pepper
With a sauce brush, coat each piece with BBQ sauce
Cheap Eats :: Barbecue Baked Chicken
Bake for 20 mins
Take chicken out of the oven and brush each piece with BBQ sauce again
--
Bake 20 more mins
Take chicken out of the oven and brush each piece with BBQ sauce again
--
Bake 5-10 more minutes
Remove from the oven and let cool for 5 mins and serve
Cheap Eats :: Barbecue Baked Chicken

Total approximate costs:
8 Chicken Thighs :: $3
1/2 Bottle of BBQ sauce :: $.75
Side dish costs :: We had salad
1/4 head of Romaine lettuce $0.50
2 carrots $0.25
A bit of Ranch $0.25

Total : $4.75 serves 4 :: $1.18 a serving

Tuesday, May 28, 2013

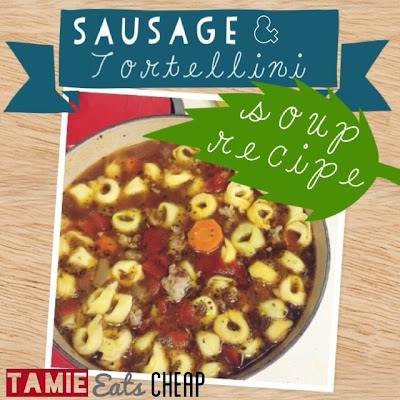
Cheap Eats :: Sausage and Tortellini Soup

Cheap Eats :: Sausage and Tortellini Soup
I love tortellini and have seen around the cybershpere a few recipes for tortellini soup and I have always been intrigued.
At both Trader Joe's and Winco, I have seen dried tortellini and been very curious about how dried cheese pasta would taste.
Last week, while doing my routine recipe browsing I ran across this recipe. I liked that dried tortellini was used and decided to give this one a go, with some minor changes based on what I had in the house and whatnot. 
Cheap Eats :: Sausage and Tortellini Soup
And here is what I did:
Cheap Eats :: Sausage and Tortellini Soup
Sausage and Tortellini Soup 

1a. Boil according to directions in a small saucepan
4 oz of dried tortellini [drain and set aside]  
1b. Brown in soup pot/dutch oven
1 pound sweet Italian turkey sausage [pull it out of the pot and set aside]

2. Saute with a bit of olive oil or butter
1 cup chopped sweet onion [for 5 mins]
1 clove garlic, minced [throw in for the last minute or two]


2. Add, and simmer 30 minutes:
5 cups beef broth (use homemade, canned, or reconstituted bouillon) [I used bouillon because it's more cost effective, we're on a budget here!]
1 14oz can of diced tomatoes [next time I'd used crushed, but that's just me]
8 oz. tomato sauce [Left out, because I forgot it...ha!]
1 cup sliced carrots
1 medium pepper, chopped [I used a healthy pinch of red pepper flake...not the same, but I like a bit of heat.]
½ teaspoon basil
½ teaspoon oregano
½ teaspoon rosemary (I omit this) I also left this out

3. Add and boil for 1 minute:
½ cup red wine or sherry no booze, too expensive...so I omitted it.
4 oz. dry tortellini, cooked according to package directions
Browned Sausage

The soup was good! I think dried tortellini is pretty good! It's not fresh, by any means...but not a bad inexpensive substitute. Way better than no tortellini at all!! HA!

I served mine with fresh baked bread made with the Artisan Bread in 5 Minutes a Day method.
Cheap Eats :: Sausage and Tortellini Soup

This recipe for bread is my favorite and super simple to have fresh bread whenever you want. Delicious!