Showing posts with label cheapeats. Show all posts
Showing posts with label cheapeats. Show all posts
Monday, June 3, 2013
Cheap Eats :: Barbecue Chicken Pizza and Pizza Dough Recipe
Pizza is one of my very favorite foods. I could really, honestly eat it every single day. I have some favorites that I make on a regular basis...and BBQ Chicken is a family favorite in our house.
Depending on my monthly budget, I sometimes buy ready made dough in the store. Both Trader Joe's and Winco have really yummy bagged dough in both white and whole wheat varieties. I love all 4 variations.
But when things are extra tight...you cannot beat homemade dough. It's really not that difficult to whip up and it costs pennies to make.
Here is a recipe I have been using recently. My family likes it very much and I do too, though I am still experimenting now and again to find the perfect one.
Don't get hung up on the equipment. You can make a square pizza on a cookie sheet, you can even use an old cast iron skillet for a deep dish style pie.
I enjoy using my pizza stone, but mine is 13" so when I need to feed a group, I use a large 16" pizza pan.
Tamie's Pizza Dough Recipe
Ingredients:
2 1/4 tsp Dry Active Yeast
1 cup lukewarm water
1 tbs sugar or honey
2 1/4 cup All-purpose flour [plus up to 1/2c on the side for kneading]
1 tsp salt
1 tbs Olive Oil
1. add yeast and sugar to lukewarm water (set aside to activate)
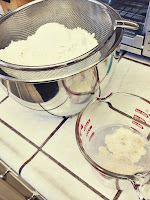
2. mix flour and salt in your stand mixer bowl (or in a regular bowl)
3. add water/yeast mixture to the flour
4. add olive oil in as well
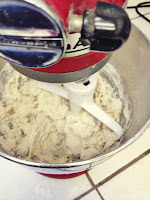
5. using the paddle attachment, mix on low until well incorporated.
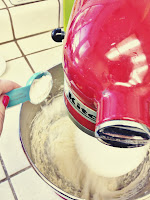
6. switch to your dough hook, knead dough on high speed for 5 mins [add more flour to the bowl 1tbs at a time until your dough isn't sticking to the bottom of the bowl anymore]
7. when your dough is done kneading, add it to an oiled/greased bowl and let the dough rise for 1-2 hours, or until it has doubled in size. [I like to put it in the oven with the light on, cover it with plastic wrap or a clean kitchen towel if you'd like...sometimes I do, sometimes I don't]
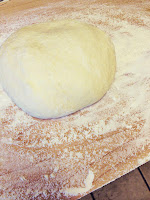
8. turn your dough out onto a floured surface or pizza peel to rest for 10-20 mins. (while you assemble the ingredients for your pizza)
*note: For a 12-14" pie, this dough will make two pizzas. For bigger pies, use the whole ball. Normally I divide my dough in half on the cutting board and save the other half for another night. (use within a day or two or freeze for a month or two) This time I used the whole ball for a 16" pie.
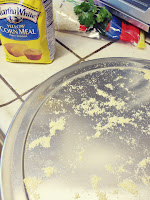
9. I add cornmeal to the pan I am using for my pizza so the dough will not stick. It will not burn and it's especially important if you are using a pizza stone. If you are using a baking sheet, you can opt for cooking spray.
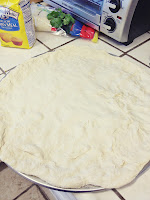
10. stretch or roll out your dough to the size needed. I stretch mine by hand...but rolling is fine. I'm even trying to teach myself to spin the dough. But this still scares me and I'm not good enough at it to instruct anyone on it yet.
Now to the Barbecue Chicken Pizza portion of the post:
Friday, May 31, 2013
Cheap Eats :: Make your own bagged salad
I mentioned in my "Meal-planning 101" post that you should never bother with buying bagged salad or lettuce. Good quality lettuce is expensive when purchased bagged and the quality suffers so much before you ever even open it. Buying lettuce, chopping, washing and storing it yourself is super duper simple and best of all...it's cheap!
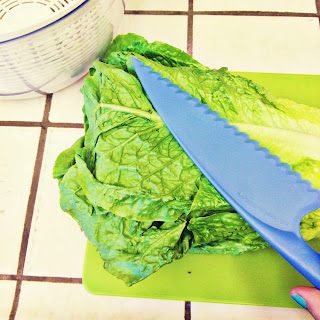
At Winco, I buy a head of Romaine lettuce for $1.48. When I get it home, I get out my handy dandy Lettuce Knife (pictured) and prepare to chop. The lettuce knife is plastic and serrated. It's said that using a plastic knife keeps the lettuce from oxidizing and turning brown at the edges. I have used both a lettuce knife and a regular metal one and have noticed very little difference. So, if you don't have one, don't let that deter you from trying this.
Equipment Needed:
Continue chopping it in one inch slices all the way up!
Dump the lettuce in your salad spinner and fill the bowl with the coldest possible water from your tap. The cold water with refresh your lettuce and make it bright and crispy. I let mine soak for awhile...usually while I cook dinner.
Once you let it soak strain it and empty the water from your spinner. I spin my lettuce twice to get it as dry as possible. If you don't have a spinner, you can let it sit out in the strainer or dry it with paper towels...though a salad spinner is a worthy investment and can be bought on the cheap.
Dump the dried lettuce in the gallon sized zip-top bag, toss in your paper towel or napkin and seal it up, removing as much air as possible from the bag.
And that's it! My salad lasts up to a week or more in the fridge. I've had it last 2 and a half weeks before with only slight browning at the edges (which doesn't effect the taste very much at all).
Never buy that bagged crap again!
At Winco, I buy a head of Romaine lettuce for $1.48. When I get it home, I get out my handy dandy Lettuce Knife (pictured) and prepare to chop. The lettuce knife is plastic and serrated. It's said that using a plastic knife keeps the lettuce from oxidizing and turning brown at the edges. I have used both a lettuce knife and a regular metal one and have noticed very little difference. So, if you don't have one, don't let that deter you from trying this.
Equipment Needed:
- Cutting Board
- Salad Spinner or large bowl and strainer
- Plastic Lettuce Knife or a good sturdy knife
- A gallon zip-top bag
- A paper towel or napkin
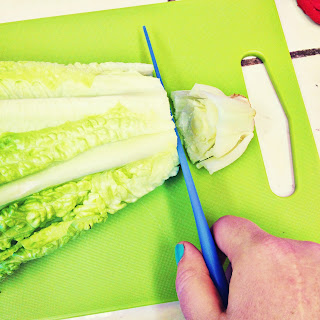
I chop before I wash. It's much easier that vice versa. Lay you head of lettuce on the cutting board and begin chopping at the base.
Throw that bit away, compost it...or use it to regrow your head of lettuce.Continue chopping it in one inch slices all the way up!
Dump the lettuce in your salad spinner and fill the bowl with the coldest possible water from your tap. The cold water with refresh your lettuce and make it bright and crispy. I let mine soak for awhile...usually while I cook dinner.
Once you let it soak strain it and empty the water from your spinner. I spin my lettuce twice to get it as dry as possible. If you don't have a spinner, you can let it sit out in the strainer or dry it with paper towels...though a salad spinner is a worthy investment and can be bought on the cheap.
Dump the dried lettuce in the gallon sized zip-top bag, toss in your paper towel or napkin and seal it up, removing as much air as possible from the bag.
And that's it! My salad lasts up to a week or more in the fridge. I've had it last 2 and a half weeks before with only slight browning at the edges (which doesn't effect the taste very much at all).
Never buy that bagged crap again!
Thursday, May 30, 2013
Cheap Eats :: Barbecue Baked Chicken
Barbecue Baked Chicken is one of our staple dinners. It's very inexpensive and easy to make. I feel almost silly even blogging about it, but since I once needed to to a Google search on how to do it, I figured you might need the know-how too.
Barbecue Baked Chicken
Ingredients
Directions
Preheat oven to 400F
Rinse chicken and pat dry
Place chicken on foil lined baking sheet
Sprinkle each leg with salt and pepper
With a sauce brush, coat each piece with BBQ sauce
Bake for 20 mins
Take chicken out of the oven and brush each piece with BBQ sauce again
--
Bake 20 more mins
Take chicken out of the oven and brush each piece with BBQ sauce again
--
Bake 5-10 more minutes
Remove from the oven and let cool for 5 mins and serve
Total approximate costs:
8 Chicken Thighs :: $3
1/2 Bottle of BBQ sauce :: $.75
Side dish costs :: We had salad
1/4 head of Romaine lettuce $0.50
2 carrots $0.25
A bit of Ranch $0.25
Total : $4.75 serves 4 :: $1.18 a serving
Barbecue Baked Chicken
Ingredients
- 8-10 bone-in, skin-on chicken thighs or legs
- about a half a bottle of BBQ Sauce (I used Sweet Baby Ray's Honey BBQ Sauce, I love all the flavors of this brand...and it's cheap!)
- kosher salt and pepper
Directions
Preheat oven to 400F
Rinse chicken and pat dry
Place chicken on foil lined baking sheet
Sprinkle each leg with salt and pepper
With a sauce brush, coat each piece with BBQ sauce
Bake for 20 mins
Take chicken out of the oven and brush each piece with BBQ sauce again
--
Bake 20 more mins
Take chicken out of the oven and brush each piece with BBQ sauce again
--
Bake 5-10 more minutes
Remove from the oven and let cool for 5 mins and serve
Total approximate costs:
8 Chicken Thighs :: $3
1/2 Bottle of BBQ sauce :: $.75
Side dish costs :: We had salad
1/4 head of Romaine lettuce $0.50
2 carrots $0.25
A bit of Ranch $0.25
Total : $4.75 serves 4 :: $1.18 a serving
Tuesday, May 28, 2013
Cheap Eats :: Sausage and Tortellini Soup
I love tortellini and have seen around the cybershpere a few recipes for tortellini soup and I have always been intrigued.
At both Trader Joe's and Winco, I have seen dried tortellini and been very curious about how dried cheese pasta would taste.
Last week, while doing my routine recipe browsing I ran across this recipe. I liked that dried tortellini was used and decided to give this one a go, with some minor changes based on what I had in the house and whatnot.
And here is what I did:

Sausage and Tortellini Soup
1a. Boil according to directions in a small saucepan
4 oz of dried tortellini [drain and set aside]
1b. Brown in soup pot/dutch oven
1 pound sweet Italian turkey sausage [pull it out of the pot and set aside]
2. Saute with a bit of olive oil or butter
1 cup chopped sweet onion [for 5 mins]
1 clove garlic, minced [throw in for the last minute or two]
2. Add, and simmer 30 minutes:
5 cups beef broth (use homemade, canned, or reconstituted bouillon) [I used bouillon because it's more cost effective, we're on a budget here!]
1 14oz can of diced tomatoes [next time I'd used crushed, but that's just me]
8 oz. tomato sauce [Left out, because I forgot it...ha!]
1 cup sliced carrots
1 medium pepper, chopped [I used a healthy pinch of red pepper flake...not the same, but I like a bit of heat.]
½ teaspoon basil
½ teaspoon oregano
½ teaspoon rosemary (I omit this) I also left this out
3. Add and boil for 1 minute:
½ cup red wine or sherry no booze, too expensive...so I omitted it.
4 oz. dry tortellini, cooked according to package directions
Browned Sausage
The soup was good! I think dried tortellini is pretty good! It's not fresh, by any means...but not a bad inexpensive substitute. Way better than no tortellini at all!! HA!
I served mine with fresh baked bread made with the Artisan Bread in 5 Minutes a Day method.
This recipe for bread is my favorite and super simple to have fresh bread whenever you want. Delicious!
At both Trader Joe's and Winco, I have seen dried tortellini and been very curious about how dried cheese pasta would taste.
Last week, while doing my routine recipe browsing I ran across this recipe. I liked that dried tortellini was used and decided to give this one a go, with some minor changes based on what I had in the house and whatnot.
And here is what I did:

Sausage and Tortellini Soup
1a. Boil according to directions in a small saucepan
4 oz of dried tortellini [drain and set aside]
1b. Brown in soup pot/dutch oven
1 pound sweet Italian turkey sausage [pull it out of the pot and set aside]
2. Saute with a bit of olive oil or butter
1 cup chopped sweet onion [for 5 mins]
1 clove garlic, minced [throw in for the last minute or two]
2. Add, and simmer 30 minutes:
5 cups beef broth (use homemade, canned, or reconstituted bouillon) [I used bouillon because it's more cost effective, we're on a budget here!]
1 14oz can of diced tomatoes [next time I'd used crushed, but that's just me]
1 cup sliced carrots
½ teaspoon basil
½ teaspoon oregano
3. Add and boil for 1 minute:
4 oz. dry tortellini, cooked according to package directions
Browned Sausage
The soup was good! I think dried tortellini is pretty good! It's not fresh, by any means...but not a bad inexpensive substitute. Way better than no tortellini at all!! HA!
I served mine with fresh baked bread made with the Artisan Bread in 5 Minutes a Day method.
This recipe for bread is my favorite and super simple to have fresh bread whenever you want. Delicious!
Saturday, May 25, 2013
Cheap Eats :: Blueberry Scones
Yesterday was my birthday. I woke up earlier than usual and I was bleary-eyed and hungry. I wanted something a little bit special, but it was just me, home alone.
So I looked at my Pinterest food board "Eat This!" to find something yummy looking and easy.
I found this pin for Simple Scones.
 |
| image from The Grower's Daughter blog |
Here is their recipe: [with their notes]
Simple Scones
1 tbsp. Icing sugar
2 1/2 c. plain flour [spooned and leveled]
1 1/2 tsp. baking powder [good quality to help them rise beautifully]
pinch of salt
1 c. milk
1 oz. melted butter
White sugar and 1 tbsp. milk for tops
Preheat oven to 425 degrees Fahrenheit. In a bowl, sift together dry ingredient. Add milk and butter. Stir with a knife to combine [don't over mix, and stop stirring once it's mostly incorporated].
Once it's roughly together and sticky, turn out onto a lightly floured surface. Knead quickly and gently together just until smooth. [This is key! The dough should be slightly sticky and moist so that the dough incorporates quickly. Just do quick little pats and turns until it's fairly smooth and not piece y. Over - kneading activates the gluten too much and makes the scones tougher.]
Pat disk out until it's about 1 1/2 inches thick. Using a 2" diameter circle cutter, cut scones from dough. Place circles on a lightly greased cooking sheet. Quickly and gently knead the scraps and cut again until all the dough is used.
Brush tops with milk and sprinkle with sugar. Bake 10 minutes and remove when golden.
[I found that the baking time was actually more like 15 minutes, and that they browned nicer, without over baking, when I turned on the broiler for the last minute or two, watching carefully.]
-------------------------------------------------------------------
Ok...so a couple of things...
One, there is no where near enough salt in this recipe. A pinch is relative, but yikes...I would add at LEAST a full 1/8 tsp of salt next time...and I used salted butter. I may even want to use 1/4 tsp. I think a bit more sugar would be nice too...not much, just another teaspoon to so.
Second, do not make these too thick. Even at around 1 3/4" thick (I went a tad thicker than the recipe), these took a very long time to bake through...20 full minutes at least (not 10-15 as stated). I would go with 1" to 1-1/4" thick next time.
Otherwise, they were ok. I will attempt them again with more salt + sugar and see how it goes. After I perfect the recipe, I'll repost it.
They were edible with butter and Lemon Curd, next time with more salt + sugar...they will sing! I'm actually kind of excited to try them again!
Subscribe to:
Posts (Atom)


